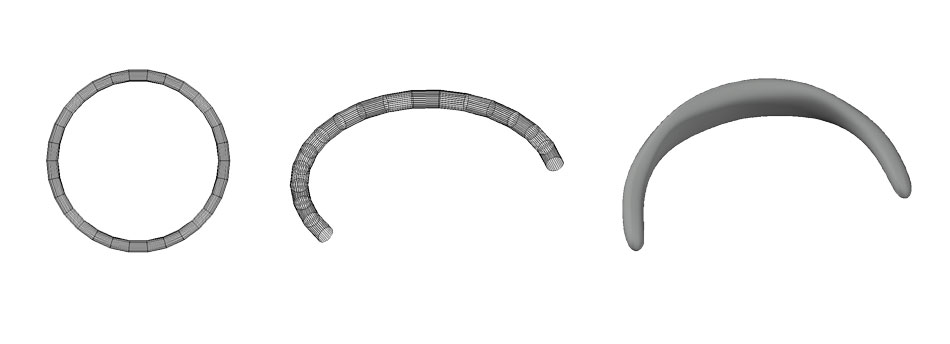
Following on from the solid 3D modelling documented previously, I was tasked producing some models of my choice using the mesh tool. Mesh modelling is one of three main types of 3D modelling in AutoCAD, alongside solid and surface. Mesh modelling in its most simple form bridges the space between lines with a mesh made of polygons. Mesh modelling, when used correctly, can be used to produce smooth and organic shapes that would be very difficult to make using other 3D techniques. Here I will show you two different models I made using mesh, a lamp and some headphones. They were both made in different ways; the first primarily using the revolved mesh surface method.
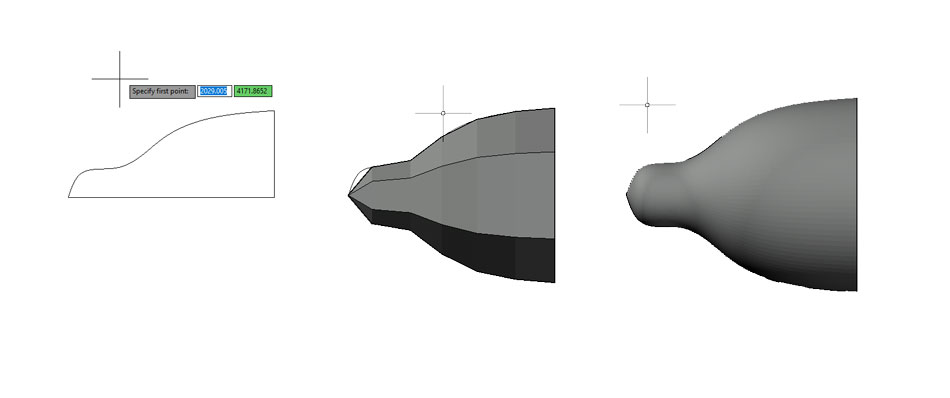
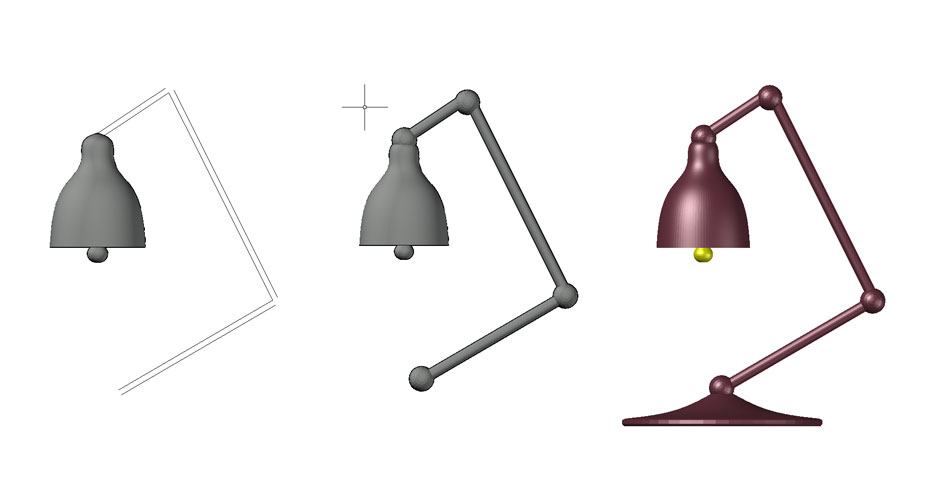
The first step was to draw a profile and a central axis for the mesh to revolve around. Note that in the centre image the polygons are rather large, resulting in a blocky shape that is unable to fit the profile properly. I used the 'surftab' command to change the polygon count. The considerably better-defined mesh can be seen on the far right. This mesh surface has over 10 times the polygon count of the first attempt. This will slow down computer performance significanltly when making a larger and/or more complex model. Next I used the same revolve technique to make the arms and base. Standard mesh spheres were used to fill in the gaps and I put the lamp body and bulb on different payers so I could colour them independently.
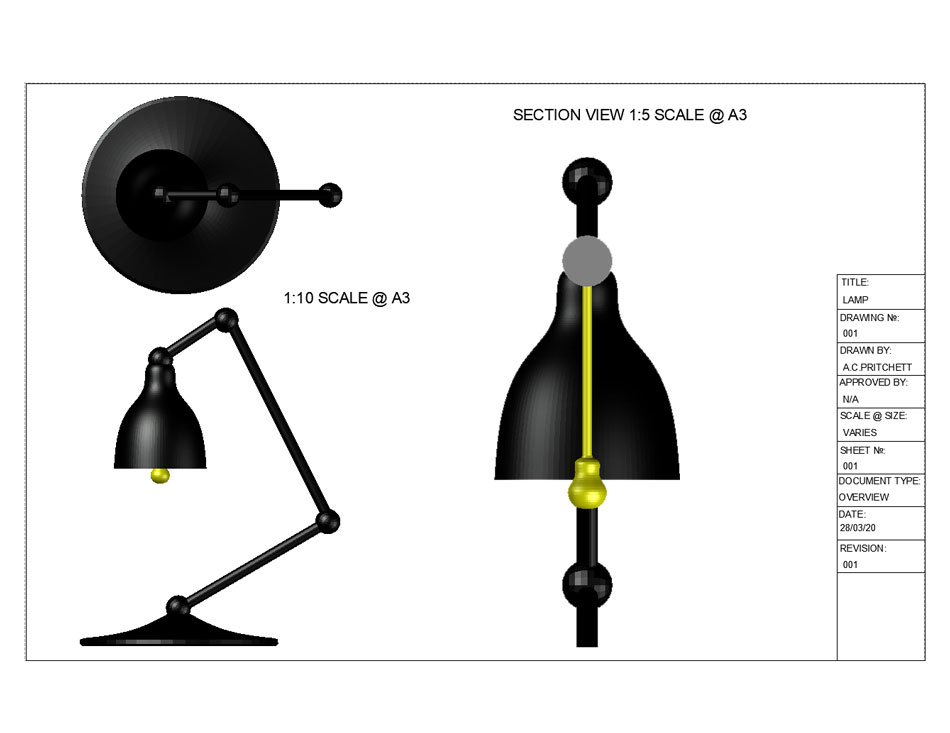
I used my A3 title block to display the finished mesh model. The sheet has two different orthographic views of the assembled product and I also included a section view to show the fibre-optic bulb (in the shape of a traditional lightbulb) running through the lampshade and into the articulated arm. Note there are two different scales on view.
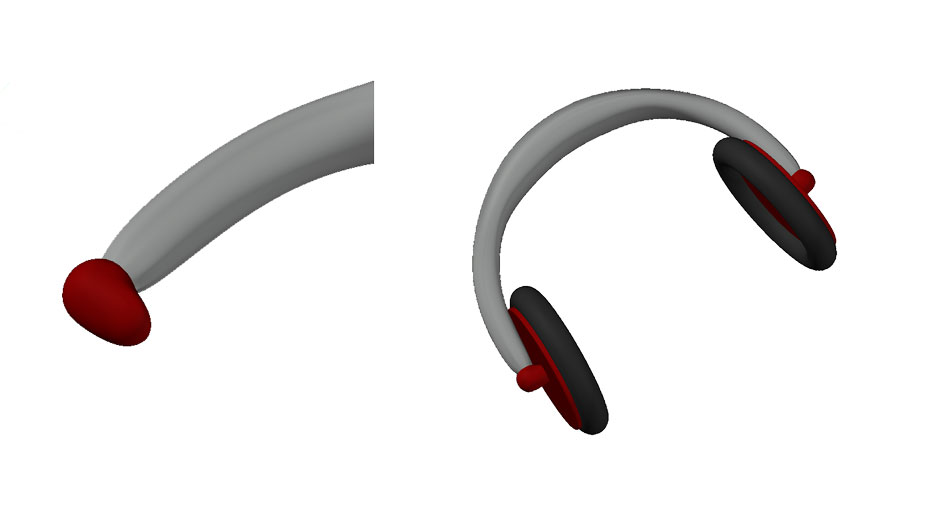
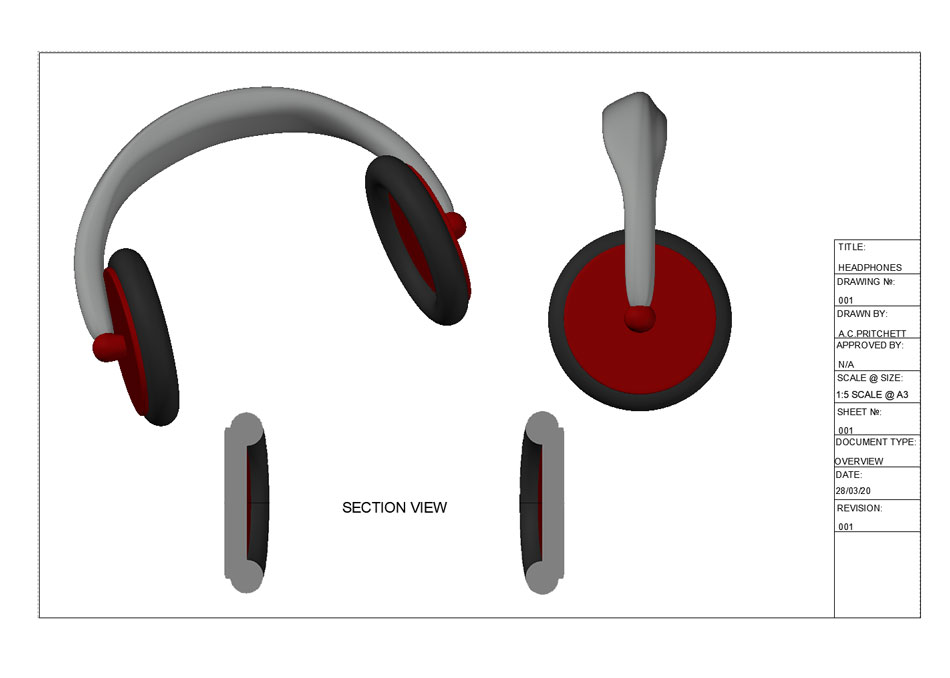
For my next model I used a less sophisticated technique but it ended up being rather fustrating. I used primative shapes (standard pre-made mesh shapes) to make some headphones. Using primatives can save a lot of time compared with making mesh shapes using drawings like I did for the lamp. I started with a mesh torus (donut) which I exploded so I could seperate and delete half the faces to create a length of curved mesh tube. I filled in the holes either end with a mesh surface. From here I extruded various faces out to mould the shape to a more ergonomic form before smoothing the whole thing as much as possible to resemble smooth plastic. The fustrating part was then adding the earpieces on (again, mesh tori) at a perpendicular angle to the edges of the curved section. This took a lot of moving the UCS around. Luckily once I got one right I was able to mirror it over to the other side without issue.
